How To Fold Quilts On The Bias

Quilts that get folded the same way all the time, develop creases that won’t come out. Folding quilts on the bias, helps prevent this, and it is easier to fold to a size that fits in your storage space.

First, lay the quilt to be folded, pretty side down on a bed or large table. Grasp any corner and bring it to within 3-4 inches of the opposite edge.

First Bias Fold

Next, working clockwise, grasp the point just made and bring it 3-4 inches past the opposite edge.
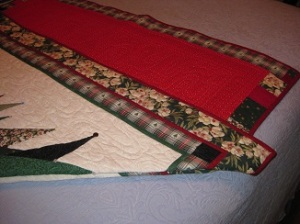
Second Bias Fold

Then, still working clockwise, grasp the next corner and bring it 3-4 inches within or just past the folded edge, or as in the photo below, I have folded so the edge to the front of the picture is twice the width of the shelf I will be placing it on.

Bias Fold to shape Size

Now grasp the fourth corner and bring it to within 3-4 inches or just past the folded edge. My shelves are 18 inches deep so this  bias fold is 18 inches from the front edge.

Why 3-4 inches within or just past the point or edge? It prevents you folding in the same place, as it is harder to guess the same each time.
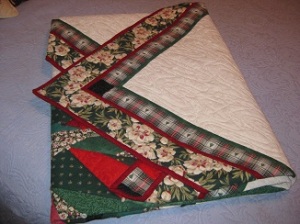
Fourth Bias Fold

If your quilt is bigger, you may need to fold the quilt in half a couple of times, but all your folds will still be on the bias. Here is the quilt folded in half once to fit my selves.

Folded to Size

You notice the quilt is folded pretty side out? This makes any creasing that might happen if something heavy gets piled on the quilts be on the backside of the quilt. If you are concerned about them getting dirty, store each quilt inside a cotton pillowcase.

Wash Big Yardages Without Wrinkles

I am a prewash every fabric person. I want the sizing removed for applique and the grain of the fabric to relax and straighten out. This trick makes washing those large pieces easy and you don’t get wadded up wrinkles.

Selvage pinned fabric

Open up the fabric all the way so it is a single layer. Accordion fold along one selvage edge, about 15-18 inches wide. Using rust free quilting pins, pin through all layers, every 2 inches. DON’T pin the other selvage. Wash, either by machine or by hand.

Washed Fabric

When it comes from the washer, it will look a mess. DON’T try to straighten it out. Just toss it in the dryer and dry.

Dried Fabric

When it is dried it will look better, but not much. Don’t panic. Rummage around in the fabric until you find the selvage edge where the pins are. Grip that in both hands and start shaking. After a dozen or so good brisk shakes, most of the folds will have returned to the right spot with no twisted up wrinkles.

Washed and shaken fabric

Here we have, washed and shaken out fabric. No wrinkles and very few frayed threads on the cut edge.

Background Choices

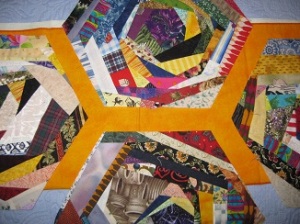
Selecting just the right background fabric can make or break a quilt. Taking pictures of choices is a great way to compare, and the camera lens often exposes fabric clashes. Here are several more options for Scrappy Hexies.

Lavenderor gold options

Lavender seems to bring out the warm red tones and the more muted gold makes the blocks appear brighter.

Cheddar option

This cheddar option seems to meld the blocks together without loosing their definition. What do you think? Please comment below.

Scrap Reduction Ideas

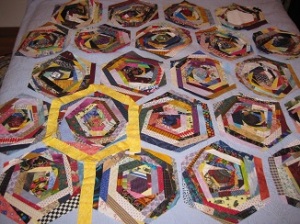
Scrappy Hexies

These Scrappy Hexie Blocks measure 6 1/2 inches on a side. I am considering finishing the quilt with yellow sashing or a gray-blue similar to what they are laid out on. What do you think? There will be some negative space and a border of which ever one I choose.

Now for all the great suggestions on taming the scrap pile:

Lots of you make charity quilts with your scraps.

Rhonda sorts her scraps into large plastic totes by theme, then when she wants to make a charity quilt she pulls out the themed tote that fits the current need.

Kathy cuts scraps into 2 inch and 2 1/2 inch squares, then sews then into 4 patches as she is chain piecing. When she gets a stack of them done she stitches up a quilt top.

Anne and Eileen toss them into a big bag to sort later. 🙂

Deb mentioned Bonnie Hunter and her scrap projects. Google Bonnie Hunter and you will find hundreds of scrap projects.

Sherry stitches her scraps into charity quilts.

Share any additional Scrap Reduction Project ideas in the comments. Scraps happen so you can never have to many scrappy project suggestions.


Scrap Reduction Project

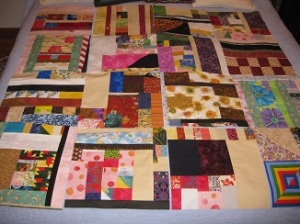
23 Scrap Blocks

While I was sorting and cleaning the studio, filling the two boxes that Marilyn and Kathy won, I sewed all the scraps to small to save into these Scrappy Crazy blocks. These are 12 1/2 inch blocks, but you can make them any size.

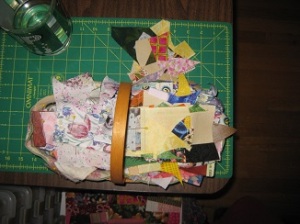
Basket of Twos

To get started, pin scraps of similar size together in twos. I keep mine in a small basket near my sewing machine to use as chasers when chain piecing.

Sewn Chasers

Here are some of the chasers sewn and pressed. I don’t trim until I am ready to add a third piece, because I won’t know which side I will want to match.

Strips and Strings

Then I add the stringy pieces to the scrappy pieces until I get “new” fabric big enough to cut my desired size block. Any trimmings 3/4 inch or bigger go back into the mix for the next blocks. There are usually 5-10 blocks in progress.

Blocks in Waiting

This box contains the blocks in progress and pressed stringy pieces. Every now and then I give myself a break from “work” sewing and do some slap happy, willy nilly anything goes, piecing. This nets me 2-3 scrappy quilts a year for  give away.