Category Archives: Applique

Basted Freezer Paper Applique Tips

basting
Basting the Seam Allowance to the Freezer Paper.
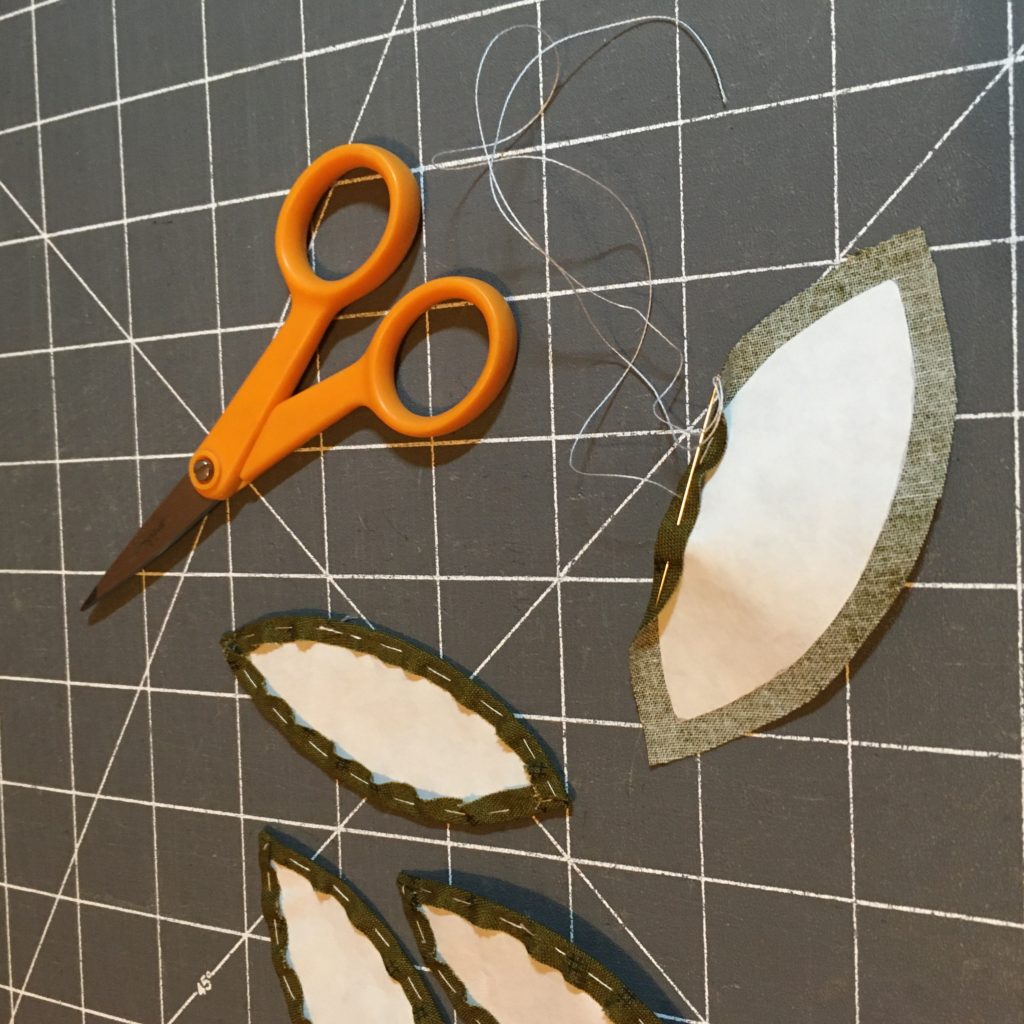
Applique shapes are cut from freezer paper and pressed to the wrong side of desired fabric with a dry iron (no steam). Then using needle and thread and a long running stitch, fold the seam allowance around the papers cut edge, creating a smooth fold and sew in place.
Basted Pieces
Using a contrasting color of thread for basting, makes removal after applique easier. These leaves are ready to be appliqued.
Basting Curved Edges
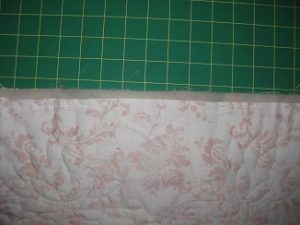
Most applique shapes have curved edges. Convex curves like the piece to the left, gather in easily. Concave curves on the piece to the right, require some clipping to lay flat. Note the clip at the point of the scissors. This clip was made after sewing the basting stitch. Clips should go only half way to the edge in the seam allowance.
Clipped and Basted
Leaves Ready to Applique
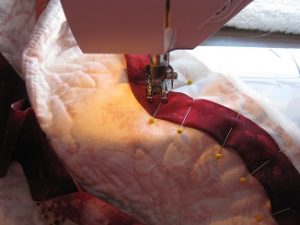
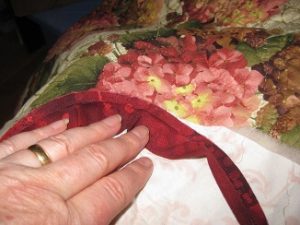
Use fine pins or a basting glue to secure to background of applique piece. Applique with matching thread. When done, remove basting then on the back of piece cut a small slit in the background fabric and pull out freezer paper.

Coin Ruched Blossoms

How to Use the TR600 Coin Ruched Blossom Guide

Marking the Fabric Circle

Cut 7 3/4 to 8 inch circles of fabric for blossoms. Fold circle in half with the grain. Place TR600 Coin Ruched Blossom Guide on folded circle with etched dash line on the fold.  Mark with your favorite marker. I use Mircon Pigma, Frixion or ceramic mechanical to mark the scallops and the dots.

Step 2

Open circle and place etched dash line on the fabric fold line, lining up the center dot to mark the other half of the circle.

Stitching the Petals

Thread a milliner needle with matching hand quilting thread and knot. Fold raw edge under so folded edge is at the point of any scallop. Sew a 1/4 inch running stitch around each scallop, turning the raw edge under as you go.

Finish Gathering

Sew around last scallop but do not knot or finish off.

Measuring

Patterns will call for specific sizes. Measurement is taken across the gathering line. This one measures 3 inches.

Blossom Ready to Shape

Looks like a little pilgrim bonnet at this point.

Preparing to Applique

Use basting glue or 4 quilters pins to position blossom. Then with milliner needle and hand quilting thread, stitch between each petal to applique in place.

Backside View

Gathering the Center

Find the center dot and stitch in place, by coming up and back down in nearly the same spot, then repeat for all the other dots, in any order you come to them.

Completed Blossom

Tulip Fields with Ladybug
Blossoms as Tulips

Or you can stretch them out with the petals all together to make tulips.


Binding a Scallop Edge Quilt

Binding a scallop edge quilt, is not hard but it does require some preciseness in sewing and making up your mind to take your time. Don’t rush, sew carefully and you will end up with lovely even scallops. And, you must use bias binding.

1. Mark the scallops at the edge of your quilt. This line will be where you match up the raw edge of the binding. Darlene Zimmerman’s Easy Scallop Tool works great.

2. DO NOT cut away any of the quilt. Pin binding so raw edge is aligned with marked line. At inside point, pin perpendicular to quilt edge. Note the pin furthest to the right.

3. Gently but firmly tug the bias binding around to the next scallop, smoothing so there are no bubbles or gaps and pin around the next scallop. Don’t get too far ahead as you may have to adjust as you sew.

4. End with needle down at inside point, pivot and use a stiletto or Purple Thang to adjust the pleat that forms so it doesn’t get caught in the seam.

5. When all the scallops are sewn and binding is joined, trim quilt along scallop edge using small, sharp scissors.

6. Using Wonder Clips or pins, turn binding to back of quilt on the rounded part of scallop first.

7. Then secure the point, doing any necessary easing at this point.

8. Hand sew binding in place using an applique stitch. It will have a nice point and smooth fold on the front and back side.

Finished edge hanging evenly.

Choosing Binding – Finishing Makes The Quilt

Selecting the right binding and finishing technique for your quilt is important. Whether you are making for yourself, as a gift or entering is competitions, how the quilt is finished plays big in first impressions.

Carol's Cats

This little quilt was made by Carol Williams and machine quilted by Kathy Conway. A Challenge at Quilt Til You Wilt, in Odessa, WA, several years ago, had Carol receiving my bag of scraps to create a quilt top and she made cats, knowing I like them. I asked Kathy to quilt before it is finished, including it in my experiment of embellishing after quilting. Kathy did a beautiful job.

Now the kitties will get faces and whiskers, and some coin ruched and gathered blossoms to lounge among.

Your part in this project is to select a finishing option. A. scrappy binding, as on the left side in the photo. B. brown stripe that matches the skinny border, as on the right. C. the pink border fabric. D. since I have not trimmed the quilt, I could add another narrow border of the brown strip and finish with the scrappy binding.

Please vote for your selection, or make other finishing suggestions in the comments below.

Wash Big Yardages Without Wrinkles

I am a prewash every fabric person. I want the sizing removed for applique and the grain of the fabric to relax and straighten out. This trick makes washing those large pieces easy and you don’t get wadded up wrinkles.

Selvage pinned fabric

Open up the fabric all the way so it is a single layer. Accordion fold along one selvage edge, about 15-18 inches wide. Using rust free quilting pins, pin through all layers, every 2 inches. DON’T pin the other selvage. Wash, either by machine or by hand.

Washed Fabric

When it comes from the washer, it will look a mess. DON’T try to straighten it out. Just toss it in the dryer and dry.

Dried Fabric

When it is dried it will look better, but not much. Don’t panic. Rummage around in the fabric until you find the selvage edge where the pins are. Grip that in both hands and start shaking. After a dozen or so good brisk shakes, most of the folds will have returned to the right spot with no twisted up wrinkles.

Washed and shaken fabric

Here we have, washed and shaken out fabric. No wrinkles and very few frayed threads on the cut edge.

Coin Ruching Continued

Ruching in progress
Ruching in Progress

IMG_2401

In the top photo, the marked strips are shown gathered along the marked lines. Use a long running stitch, almost 1/4 inch long. Use hand quilting thread for strength and durability, and match color to fabric. The contrasting color shown here is for photography purposes.

You can see the black and white, coin ruched 2 1/2 inch strip has been placed at the center of the finished 5 inch strip to make a Jumbo flower with the TR700 Jumbo Coin Ruching Guide. The pink blossom is made with the TR500 Large Coin Ruching Guide and the peach and multi color yellow flower are made with the TR400 Small Coin Ruching Guide.

Strips Marked And Ready To Ruch

Strips Marked and Ready to Ruch

The Piecing Pals, Coin Ruching Guides are used to mark even scallop shapes for hand stitching around and form petals that can be shaped into flowers and other dimensional embellishment. Frixion pens are very handy for marking the strips. A burst of hot air from a hand held hair dryer will remove any marks that might show after ruching.

Fabric Strips Prepared for Ruching

Strips basted and ready to mark for ruching
Strips Basted and Ready to Mark for Ruching

The top strip was cut 5 1/2 inches by the width of the fabric (WOF)
The second strip was cut 2 1/2 inches by WOF and the bottom strip was cut 1 1/2 inches by WOF. Wrong side was folded together and the raw edges basted together about 1/8th inch from the raw edge along the length of the strip. DO NOT PRESS, you want to keep the folded edge pliable. This step will keep the layers in place while you mark and stitch. If you are using the Coin Ruched Blossom Guide and circles of fabric, no basting is required.

Cool Tools You Need For Coin Ruching

Piecing Pals Coin Ruching Tools

These Piecing Pals Coin Ruching Guides are designed by me, produced by Quilting Creations International and are available at most quilt shops and online outlets. The guides are used to mark the stitching line for gathering the fabric into petals. Each size and style has complete instructions included in the packet. A strip the width of fabric will make a 2-3 inch blossoms with the Small (TR400) or Large Guide (TR500), 2 strips of fabric are needed for the 5-6 inch (TR700) Jumbo size. The Blossom Guide (TR600) is for 7 3/4-8 inch circles.

Tulip Fields and Trunk Shows

Tulip Fields with Ladybug
Tulip Fields, #1401 is a fun dimensional applique, wall quilt in my pattern line. Tangled Threads Quilt Shop in Lynden, Washington, made a model for their shop. This is a close up of the cute little ladybug button they added to their wall quilt. It fits in perfectly, adding additional embellishment and interest to the quilt. The dimensional tulips are a variation of Ruched Blossoms, made with the Piecing Pals, Coin Ruched Blossom Guide TR600, from Quilting Creations International. You can find more pictures of Tulip Fields on my Facebook page and on my website. Pictures of the trunk show Tangled Threads recently hosted may be found on their Facebook photo page. Laura Estes Stencils and Coin Ruching Tools may be found on Quilting Creations International website.
I find it inspiring to see what additions quilters make to the quilts they create from my patterns. A pattern is a guideline to get you where you want to go. Unless you are a quilt shop you’re probably not going to hang the pattern up with the quilt, and even then, your ideas can provide inspiration for your customers.