
How to Use the TR600 Coin Ruched Blossom Guide

Cut 7 3/4 to 8 inch circles of fabric for blossoms. Fold circle in half with the grain. Place TR600 Coin Ruched Blossom Guide on folded circle with etched dash line on the fold. Mark with your favorite marker. I use Mircon Pigma, Frixion or ceramic mechanical to mark the scallops and the dots.

Open circle and place etched dash line on the fabric fold line, lining up the center dot to mark the other half of the circle.

Thread a milliner needle with matching hand quilting thread and knot. Fold raw edge under so folded edge is at the point of any scallop. Sew a 1/4 inch running stitch around each scallop, turning the raw edge under as you go.

Sew around last scallop but do not knot or finish off.

Patterns will call for specific sizes. Measurement is taken across the gathering line. This one measures 3 inches.

Looks like a little pilgrim bonnet at this point.

Use basting glue or 4 quilters pins to position blossom. Then with milliner needle and hand quilting thread, stitch between each petal to applique in place.


Find the center dot and stitch in place, by coming up and back down in nearly the same spot, then repeat for all the other dots, in any order you come to them.

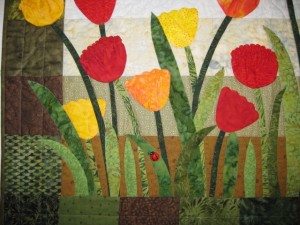
Or you can stretch them out with the petals all together to make tulips.